Friday, 28 February 2014

HOW TO CRASH INTERNET BROWSER

Friends, today i’ll share how to crash internet browser of your friends. Before explaining this trick let me tell you how this trick will work. You know what happens if a browser have to open 100 website at once, it’ll crash. So let start the trick. .

STEP 1.
Open NOTEPAD

STEP 2.
Copy and paste below code in NOTEPAD
@echo off
start www.google.com

as given example:
STEP 3.
Save it as (any name).bat  [I recommend you to give any interesting name so that your friend must click on this file. e.g FreeRecharge.bat]
STEP 4.
Give it to your friends in his pen drive, when he’ll click on it ,then boom. . you can also check it on your pc, it is not so harmful..

Thursday, 27 February 2014

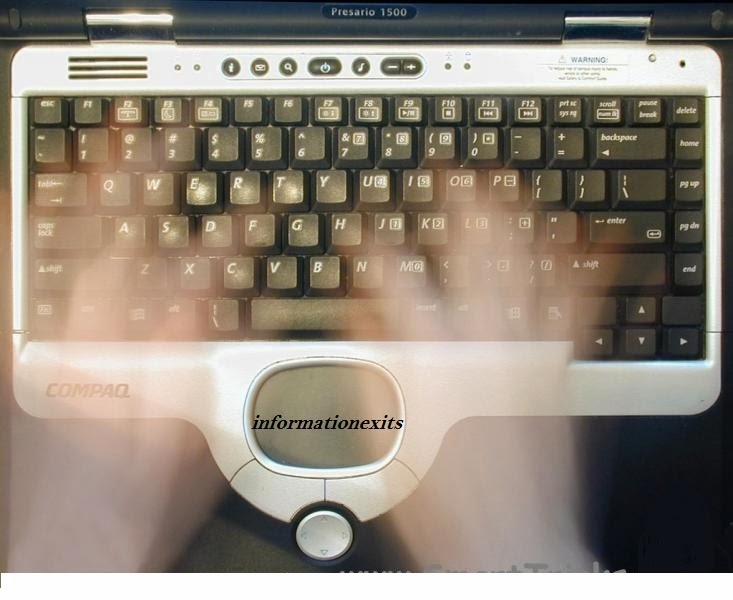
Ghost keyboard Typing-Make Notepad type Automatically

Hey guys, Today I am going to share with you a Short but Cool notepad trick. You can show it to your friends and surprise them. Basically it is a prank that you can do with anyone just for fun.
This Process is Also known as Ghost keyboard Typing.

Just follow the simple steps to Learn Ghost Keyboard Typing

Step 1: Right click on your desktop and select create new text document or simply Open Notepad.
Step 2: Exactly Copy the code given below and Paste it in notepad document that you have just created.
set wshshell = wscript.CreateObject(“wScript.Shell”)
wshshell.run “Notepad”
wscript.sleep 400
wshshell.sendkeys “i”
wscript.sleep 100
wshshell.sendkeys “n”
wscript.sleep 120
wshshell.sendkeys “f”
wscript.sleep 200
wshshell.sendkeys “o”
wscript.sleep 100
wshshell.sendkeys “r”
wscript.sleep 140
wshshell.sendkeys “m”
wscript.sleep 100
wshshell.sendkeys “a”
wscript.sleep 50
wshshell.sendkeys “t”
wscript.sleep 120
wshshell.sendkeys “i”
wscript.sleep 170
wshshell.sendkeys “o”
wscript.sleep 100
wshshell.sendkeys “n”
wscript.sleep 50
wshshell.sendkeys “e”
wscript.sleep 120
wshshell.sendkeys “x”
wscript.sleep 160
wshshell.sendkeys “i”
wscript.sleep 200
wshshell.sendkeys “t”
wscript.sleep 100
wshshell.sendkeys “s”
wscript.sleep 100
Step 3: Save the above code in Notepad file As ”informationexits.vbs ” (Without Quotes ) but make sure  While saving this file select Save as type  ”All files” and extension must be .vbs
Step 4: Now double click on The saved File, You will see “informationexits.NET ” will be typed Automatically. Moreover  you can edit the Words In the above given Code with any desired words you want Notepad to type for you. e.g. : MY FRIEND READING THIS IS FOOL..vb
IMPORTANT !!!
While Double Clicking on the saved file if you see an error box like “ line 1 ” and “Char 37” Then dont worry, Right click on informationexits.vbs and click on edit,
Now delete all Double quotations ie : ”  and Type them all manually from your keyboard, save it and now you will have no errors.
Enjoy the prank !!


Tuesday, 18 February 2014

5 DEADLY LINUX COMMANDS

Linux today is well known and well reputed one of the most powerful operating system. Linux user can perform numerous such tasks that a windows or Mac user can’t even imagine.
deadly linux command
Sometimes Linux can go extreme upto the extent that it can do serious damage to the system.
Linux system dont even ask user for confirmation once the command is given and simply performs its task.
hardware
 of your computer within a few seconds.
 Because of these harmful activities of linux it is recommended to use it only if you are good at giving commands and have in depth  knowledge of linux commands.
1. Command > rm -rf / = It will Delete Everything
Explanation : It is a combination of three keywords.
First is : rm It will remove all the files followed by this command.
Second is : -rf This will run rm command in more effective way and will remove everything ( all files and folders inside the specified folder )without asking confirmation from the user.
Third is : / This will start removing the data from the root directroy and will delete everything from the computer including the data of removable media.
2. Command > :(){ :|: & };: = Shell function that gets repliacated.
This command creates a shell function , which once get initialized starts to create multiple copies of itself.It results in taking quickly all the memory and power of CPU.It makes computer freeze or not responding. This is also known as Denial Of Service Attack.
3. Command > mkfs.ext4 /dev/sda1 = This command will format the hard disk
Explanation : This command is again composed of two keywords.
First is : mkfs.ext4 : This part of command will create a new ext4 file system on following device where this command will get executed.
Second is : /dev/sda1 ;This part of command specifies the 1st partition on the first hard disk which is probably in use by the user. Similarly, This Command > mkfs.ext3 /dev/sdb2 will Format the second partition on the second hard disk with ext3 File system.
4. Command > /dev/sda – Write Any content Directly to a Hard Drive.
Explanation : This command will execute normally as other commands in linux do. But output of this command will directly be sent to the file system (NTFS or FAT ) of the Hard Drive. It will result into damaging the file system of the computer.
5. Command > mv ~ /dev/null – Beware it Will Move your Home Directory To Black hole.
Explanation : Moving any of your content and data to following path : /dev/null means you want to destroy it.
It means /dev/null is a black hole where once anything sent , can not be recovered back.

Monday, 17 February 2014

Best Windows Explorer Hacks You must know

Every Windows User is well aware of What Windows Explorer is. Windows Explorer is also known as File Explorer particularly in Windows 8. Window’s File Explorer is something we all Use on daily basis. So why not try to make it more Productive and Efficient with some Cool Hacks. Earlier We Saw How to Get Back Start Button In Windows 8

Here in this article i have listed 5 Best Windows Explorer Hacks that you Must be aware of to make your Files management Experience more easy and efficient.

5 Best Windows Explorer Hacks

1) Edit Send to Menu: Windows By Default allows you to Send any file or folder to Desktop, or Compress it or Mail it to the Recipient of your Choice, We Can Edit this Send to Menu to display things that you want to display, you can add or delete anything from this menu Easily.
Navigate to C:\Users\*Username*\AppData\Roaming\Microsoft\Windows\SendTo.
Appdata Folder is Hidden by Default, First unhide it by Clicking on View>Option>Folder option>View> Check show hidden files,folders and Drives.
OR
You Can alternatively open Send to Folder with Run Command, Press Win+R key to open up Run Dialog, and type in shell:sendto and press Enter.
There You Can see Some Similar Files That were showing you in the Send to Menu. To Remove any Option you can delete that File from Send to folder. On the other hand to add Something to Send to Menu, Just Copy the folder that you want to show up in Send to Menu and Paste it there in that Folder. Now Check the Send to menu to See the Changes. All Done !!!

2) Add Copy to and Move to Folder options : We can add “Copy to Folder” and “Move to Folder” to your Context Menu. Windows Don’t Provide these options by default but we can add with a simple Registry hack.
To add Copy to and move to  folder Option : Click here to Download Add_Move_To_Folder.reg File,

When Everything is done, Right Click on any folder and check if its Showing Move to and Copy to Folder options. You Can see Move to and Copy to Folders are now added to your Context menu like mine.

  
Bonus Noob Tip: Hold Down CTRL key , Drag and drop Source file to Destination to Copy it. And Hold down SHIFT key, Drag and Drop Source file to Destination to Move it.

3) Change Default Folder: Whenever you Launch Windows Explorer in windows 7/8, it opens up Library folder, but may it its not that usefull for us or we need some other folder to open up when we Click on taskbar’s Windows Explorer Shortcut. So in this hack we will Change Windows Default Folder  to our Downloads Folder instead of library.
  • To Start with we will Right click on the Windows Explorer or File Explorer for Win 8 Users from the task bar icon. A list will show up, Now again Click on Windows Explorer (File Explorer) and Click on Properties.
  • You can see a Dialog Box appears, There you Can see target path is somewhat like AppData\Roaming\Microsoft\Windows\Libraries all we have to do is change this path to your desired folder that you want to open up everythime you launch file explorer.
  • As here we are going to Change it to Download Folder we will change the path to C:\Users\*Username*\Downloads. Click OK and we have successfully changed the path now.
4) Add tabs to File manager: We will be Using a Third Party tool Which is QTTabBar (2.9 mb) to Get advantage of Tabs, just like we have tabs in our Browsers. It not only Facilitates with the tabs but also provides many other usefull features that shows up in you file explorer
You will be asked for a Reboot in order to make changes after the installation process Completes. you might like to see how to disable windows restart after windows update or after installing any software.

5)Better File Copying Speed: Windows have made some efforts in windows 8 to improve Copying Speed. Copying FIles is better in windows 8 as compared to older versions but yet its slow and many times it Conflicts, so We will be Using TeraCopy to Takeup this task and its Fast and Effective. What it does is, it  Eliminates windows Default File-Copy Dialog  and gives us a better one.
After Installing TeraCopy, Whenever you Will Copy and paste, TeraCopy will Come into Action and do the Task for you much Faster. it also adds itself to Context Menu as an Option if in Case you prefer to Use it only when you Want to .


Wednesday, 12 February 2014

Customize folders with different colors in Windows

There are many softwares available today over the internet which can Customize your Computer in an efficient manner that it looks so attractive as well as it becomes very easy to use. We always want our computer to be clean and well organized so that whenever we need to access something or need to search a particular file/folder in our computer we could find it easily.
As similar to that, here I am going to share a software through which you can easily assign your favorite colors to your desired folders in order to differentiate them easily and to ease of access.

Just follow the two simple steps given below to customize your folder :

Step 1 :

First of all Download and install the software FolderColorizer. It is tested and 100% virus free. You can download itfrom here : DOWNLOAD FOLDERCOLORIZER

Step 2 :

Now after installing the software, simply right click on any folder which you wish to customize. Here when you right click on folder, you will see a new option in the context menu i.e. Colorize !. Now simply go to that option and one submenu will appear. Now choose any color you want to assign to this folder.
Although it is a free software for everyone to use it but while you will use this software for the very first time , it will just ask your email id for activation of this software. But no need to worry because you wont need to confirm the activation by logging in to your e mail account. Even if you don’t wish to share your e mail id with developers of this software you can do it because product will be activated automatically once you enter any email id. So you can also enter any fake id if you want.
For your convenience I am providing you a screenshot of above mentioned procedure for changing folder color :

In this way you will be able to easily organize folders in any of your drive weather C: , D: or any other drive. You can also assign different colors to several folders in the same drive to give it more attractive and cool looks.

Tuesday, 11 February 2014

How to Schedule emails to send in future


You never know if you will have time in nearby future. There are two instances, once when you are having enough time and no work to do and the other when you are not having time and you are having huge workload. During the times of heavy workload, there can be instances when you forget to do important things which you should have done.

Let’s say you didn’t mailed your friend for his birthday. So, what to do then? To keep yourself on a safer side you canschedule your mails when you are free.

 How to Schedule emails for sending them in future.

Boomerang for Gmail

There is a plugin, names Boomerang for Gmail which is available both for Firefox and Chrome which will help you to Schedule emails. This plugin is compatible with Gmail and using this you can take control of sending and receiving emails at desired time in your Gmail account.

How to Install Boomerang

  • Open your Google chrome or Firefox Browser and visit the Boomerang website by clicking Here.
  • Once you have visited the website, click on the Install Boomerang button which is present on the website and the installation will be started.
  • You will come across a couple of steps, follow those steps and your installation will be done.
Once the installation has been completed, the next time you will open Gmail, Boomerang will be automatically enabled. 

How to use Boomerang

  • Using Boomerang is very easy as the interface of this plugin is very user friendly. Read the guide below on how you can use Boomerang on your Gmail account to Schedule emails.
  • Compose email like you normally do.
  • On the Compose page right next to the Send button you will see a new button named Send Later. This is the button which will help you to send email later.
  • Choose the date and time as per your schedule, whenever you want to send the email.
Schedule Recurring Message :There is one great feature which comes with Boomerang and that feature is that you can schedule recurring messages to anyone on periodic basis. Let’s say you are working in a project and you are the project leader and each week you need to ask your team member about the progress report of the project. Using Boomerang you can schedule that message using the Schedule Recurring Message feature. You will see the option to schedule recurring messages once you click on the Send later Button.
Deal with emails later: Sometimes we don’t want to read the emails we received at that time. Boomerang will remind you to read the received mail at the time you have set. If you have sent an email to your entire team and you want that the person who is max qualified in your team should reply to It but he fails to reply it then you will be get notified.

Monday, 10 February 2014

How To Create Run Commands in Windows

How To Create Run Commands in Windows


There is no doubt that Microsoft Windows is the most widely used operating system in all parts of the world. Apart from being simple to use, it is quite rich in features as well, which makes our lives quite easy.
The Run command available on Windows operating system is one such power packed feature that lets you to open a document or an application instantly with the help of just 1 command. So, rather than clicking several icons or using multiple commands, you can use the Run command to open any program or document instantly. For that you will need to Create Run Commands for any software of your Choice which you use Frequently.
But, do you know how to Create Run Commands of your Own? Well, it is really easy, which involves just few steps. Through this article, I will help you understand how to access your favorite applications by creating custom Run commands.

Open Run Command:

Before I show you how to create your own Run commands, let’s take a quick look on how to open Run Command. First of all, you need to open the Run window by just pressing the Windows Key along with the R key, i.e. Windows + R. Now, you have to type the name of the program that you desire to open up or execute. Unfortunately, not all programs can be accessed through this method. So, let me show you how to create Run commands that do not come as inbuilt commands.

Steps to Create run commands of your own

Step 1. The first step is to select the software or application for which you want to make custom Run command. For example, let us consider Google Chrome as the example here. Remember, you can choose any application other than which is already there in the Run command.
Step 2. In the second step, right click on the desktop of your computer system and make a new shortcut.
Right click > New > Shortcut
Step 3. As you select the Shortcut option in the 2nd Step, it will open up a dialog box. And, the dialog box will ask you path of the application or software for which you want to create the Run command.

Step 4. Now, you need to browse through the files and choose the one that shows “chrome.exe”. Well, it is quite obvious that all the executable files can be found in the C drive (or wherever the Operating System has been installed), inside the folder “Program Files”. For example, “C:\Program Files\Google Chrome\chrome.exe
Step 5. Once you are done with Step number 4, just click on “Next” button and simply provide a relative name to that shortcut. Remember, the same name will be used later in the Run command.
For example, “GC” for Google Chrome
Step 6. Now, click on the “Finish” button. Once it is done, an icon related to that application or software will show up on your computer’s screen. It means that the process of creating shortcut has been done successfully.
Step 7. In this step, just cut and paste that recently made shortcut icon into your computer’s root drive, in its Windows folder.
For example, C:\ Windows , Make sure you are the administrator of the computer or have its password.
Step 8. Now, you are done with the set up and can run the application through Run Command. Just go to Run and enter the keyword “GC”, and Google Chrome will begin executing.